Wild Tajikistan CMS Guide
A comprehensive, guide for managing content, pages, and plugins within the WordPress dashboard.
Table of Contents

Posts & Categories
Posts are used for news, articles, trip reports, or blog-style content. Categories are essential for organizing them.
2.1.1 Add a Post Category
- Access Categories: Navigate to Posts → Categories.
- Add New Category: On the left side, enter the Name (e.g., “Trekking Guides”) and the Slug (a URL-friendly version, e.g., “trekking-guides”).
-
Save: Click the Add New Category button.

-
Assign to Post: When editing a Post, check the corresponding category box in the right-hand Categories panel.


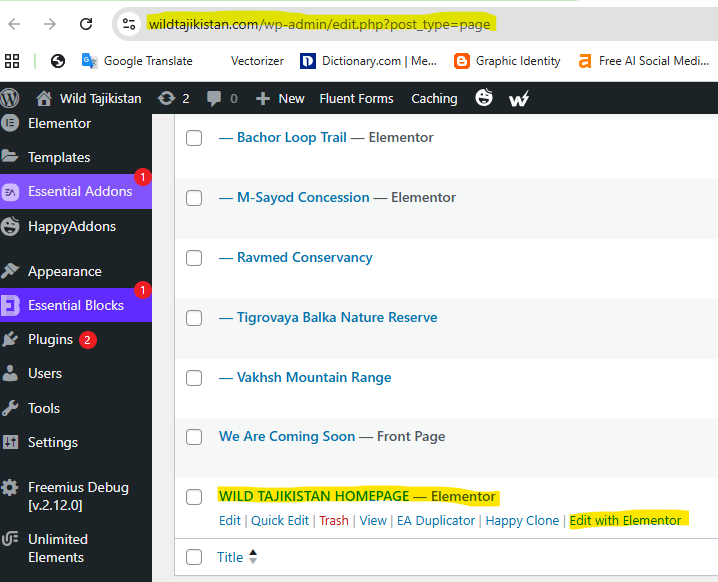
2.1.2 Duplicate a Post or a Page
When you want to have the same Post or Page layout or style, duplicating a post or a page is the best and fast solution.
- Access Posts: Navigate to Posts → All Posts.
- Locate Post/ Page: Hover over the title of the post or the page you wish to duplicate.
- Duplicate: A new option will appear and click: EA Duplicator. Click it.
-
Edit Draft: The cloned post will appear as a (Draft). Click Edit to make your changes and remember to update the Title and Slug.


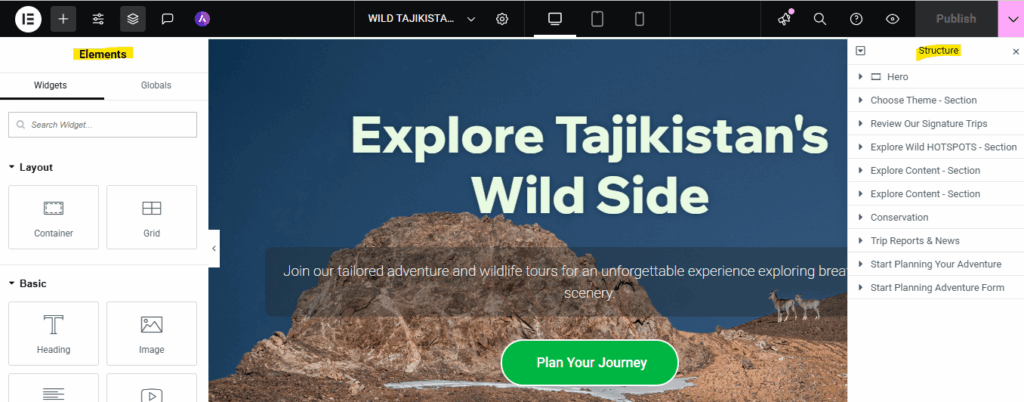
Homepage Management (Elementor)
The homepage is managed entirely by the Elementor Page Builder, giving you drag-and-drop control over its layout and content.
3.1 Accessing the Elementor Editor
- Navigate to Pages → All Pages and find the “Homepage”.
- Hover over the title and click the Edit with Elementor link.
- The editor will load with a live preview on the right and the element sidebar on the left.
3.2 Editing & Adding Content
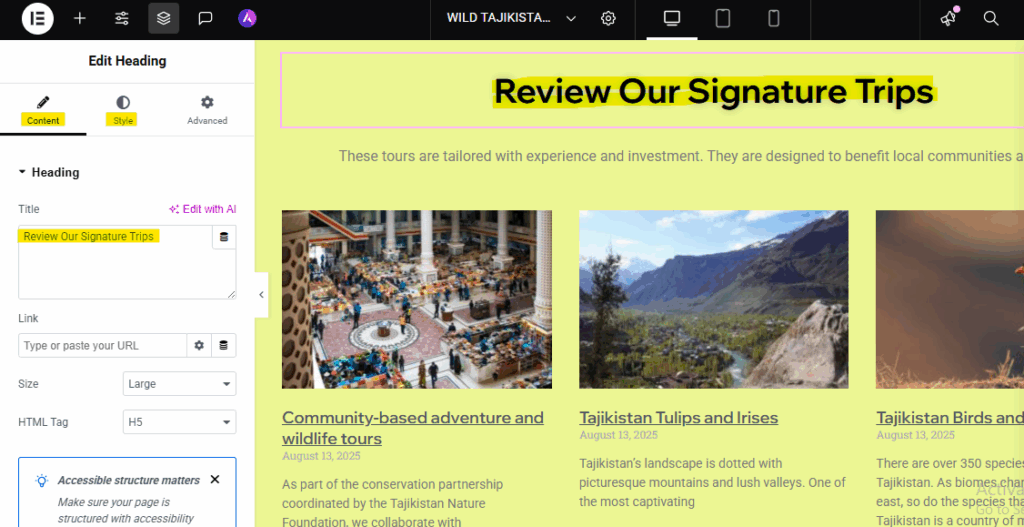
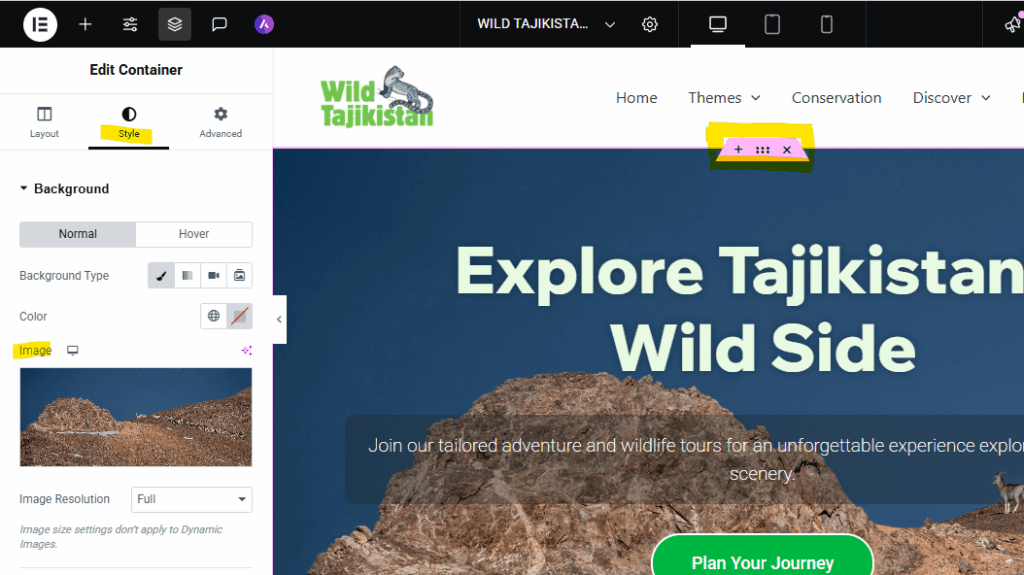
Replacing the Hero Image
Find the Hero Image container area. Click on the Edit Container handler in the top center of the container area (pink icon handler). In the left sidebar (Style tab), click the image thumbnail to open the Media Library and select or upload a new one.
Replacing an Image
Click on an existing image. In the left sidebar (Content tab), click the image thumbnail to open the Media Library and select or upload a new one.
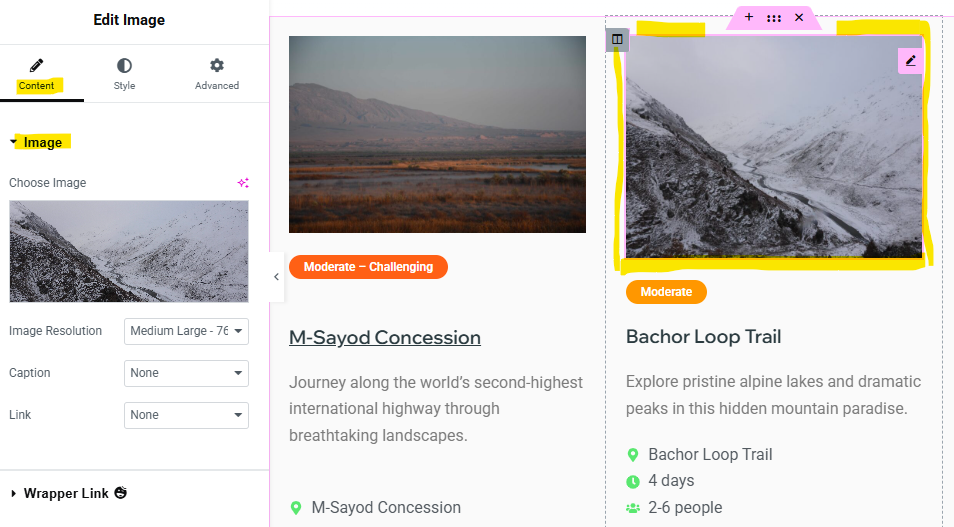
Image that is generated by a category post can only be replaced in the post editor featured image.
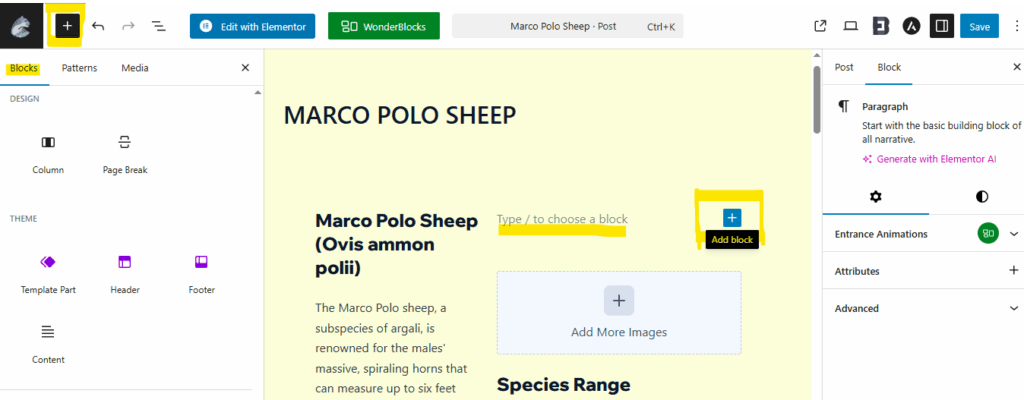
Adding New Elements (Widgets)
Click the grid icon in the sidebar to view all widgets. Drag any widget (e.g., “Button”, “Icon List”) onto the page. Configure it using the sidebar tabs.
Editing Content from Category Posts
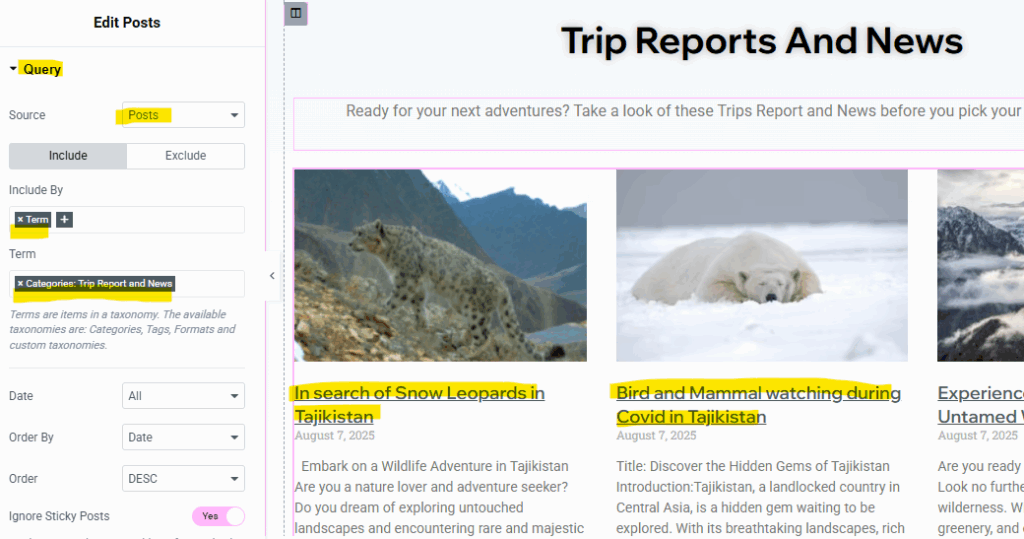
Click directly on the post grid section, The left sidebar will show Edit Post panel, then go to the Query section panel, where you can make your configuration. Select the category that you want to feature as a post grid section.
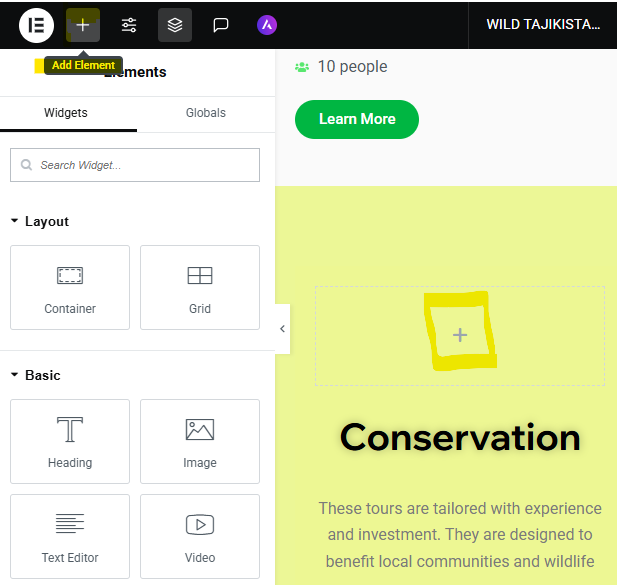
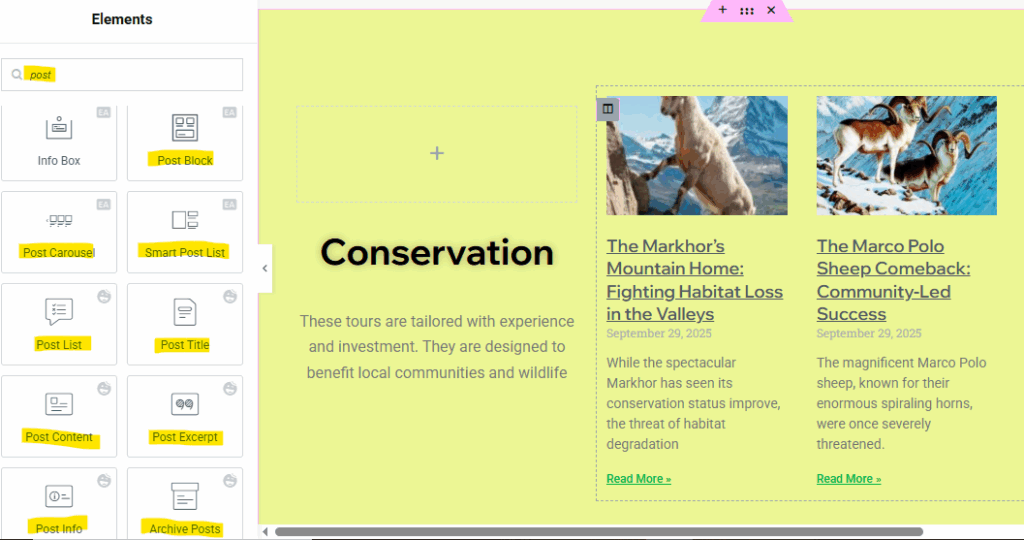
Adding Content from Category Posts
Create or add a new section, or click the Add Element icon then search ‘post’ to find all elements widget that can display content from Category Posts. Select one of them to make post query configuration.
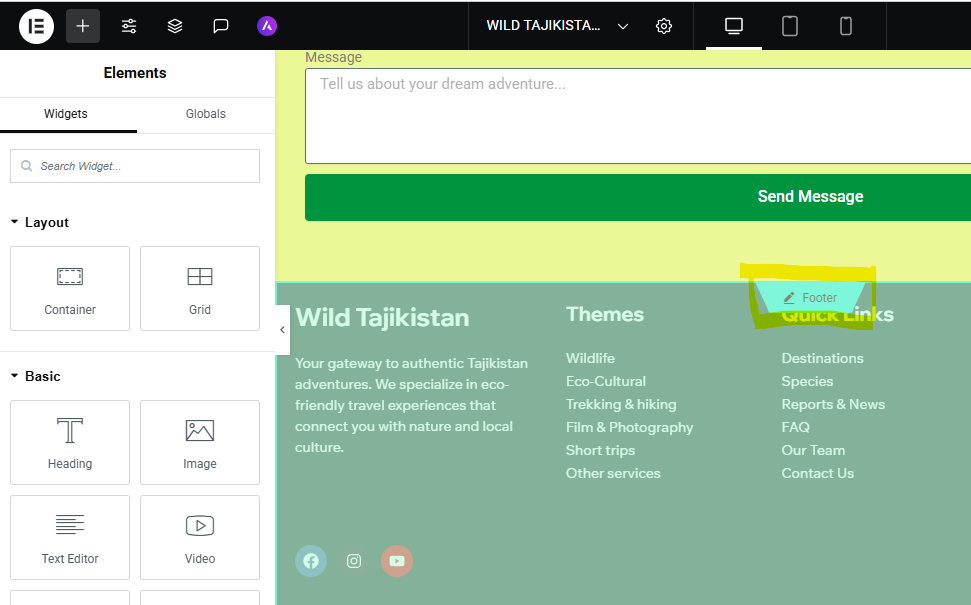
Editing Footer Area
Go to the footer area at the bottom of the homepage layout in Elementor editor. Click directly on any footer area to start editing the text or elements inside the Footer area.
Always click the green UPDATE button at the bottom of the Elementor sidebar to save your changes.
Special Pages
These special pages were build using the default WordPress Gutenberg page editor, and they are as follows:
FAQ Page (Accordion/Toggle)
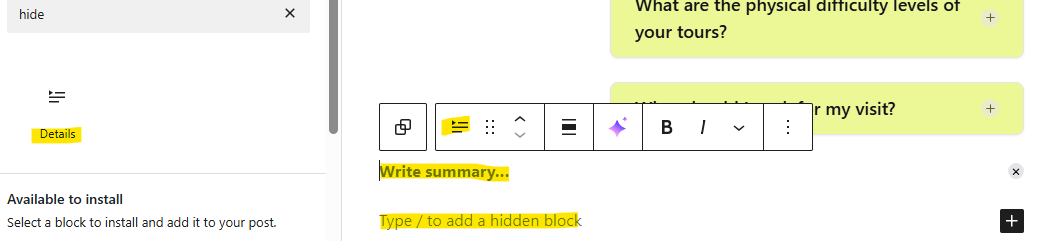
An interactive FAQ improves user experience by hiding answers until they are clicked. This uses the “Hide and Show” block
- Open the FAQ page and edit the page
- Click the Block Inserter icon at the top left of the page (blue button with a plus icon)
- Search for “Hide and Show” and you will see a block called:Detail and drag it onto the page.
-
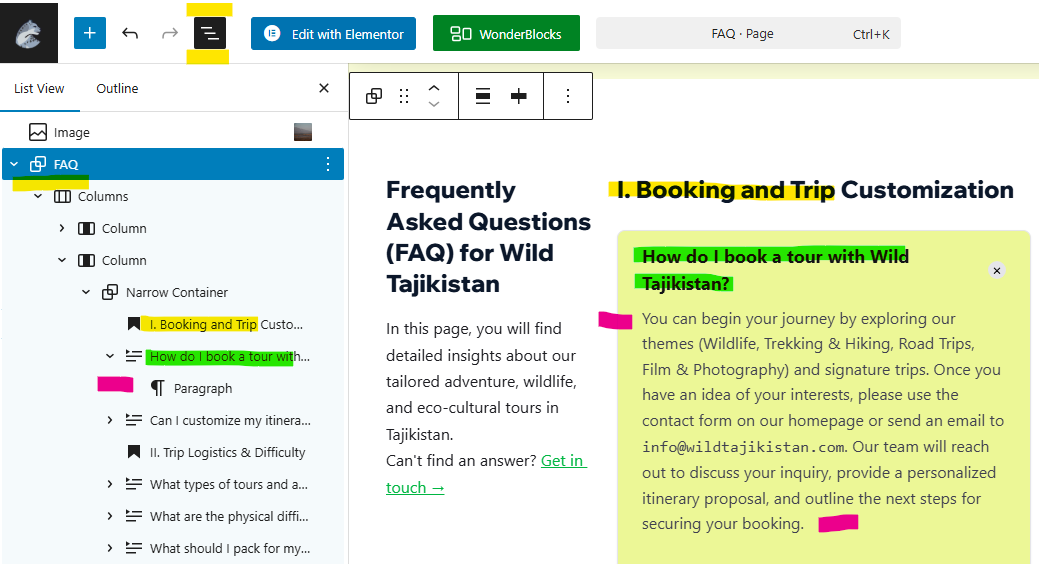
It will display a FAQ item text field. Click an item to edit its Title (the question) and Content (the answer) to add the text.
-
-
Alternatively, just duplicate the FAQ item to quickly create a new question/answer pair.
-
- Click the SAVE button to update the page
Team Page
The Team page requires consistent formatting for each member’s profile. The page is pre-designed, and it’s easy to edit the team profile card/ item.
- Open the Team page and edit the page
-
Click one of the following elements of the team profile card to start editing:
- Profile photo — Replace the dummy photo with the real team member profile photo
- Team member name
- Team member job position
- Profile description details
- Social Media icons – Use only the necessary social media icons, and delete if necessary
- Fill in the team member’s details and perfect the styling.
-
Click the column’s menu and select Duplicate. This clones the entire structure and styling, allowing you to just replace the content for the next member.
-
- Click the SAVE button to update.

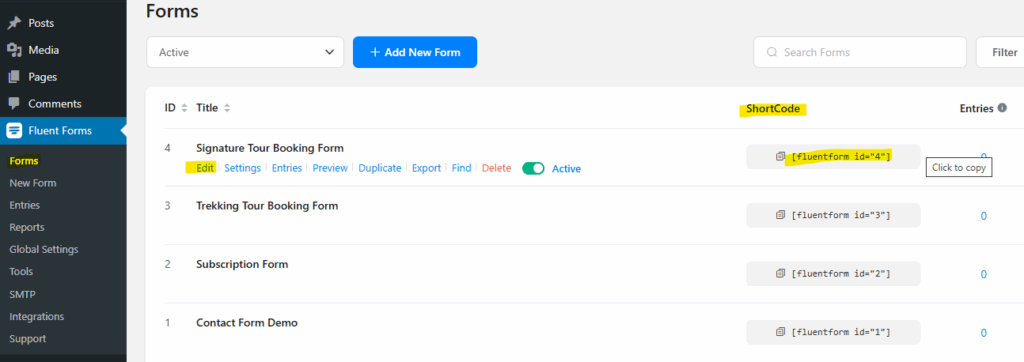
Contact Page
The contact page uses Fluent Forms shortcode to function. Here’s the steps to edit the page:
- Open the Contact Us page and edit the page.
- Edit the Headings, paragraph text by clicking on the block elements.
- Replace the Fluent Forms shortcode if you want to incorporate a different Contact Form.
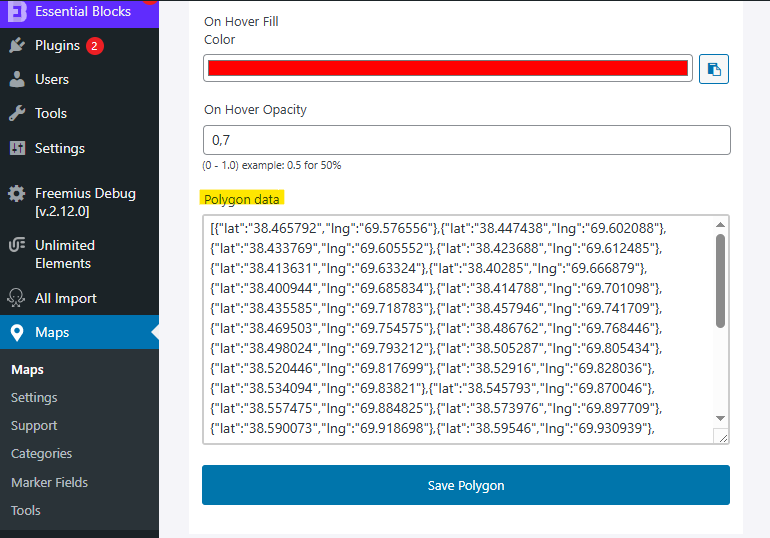
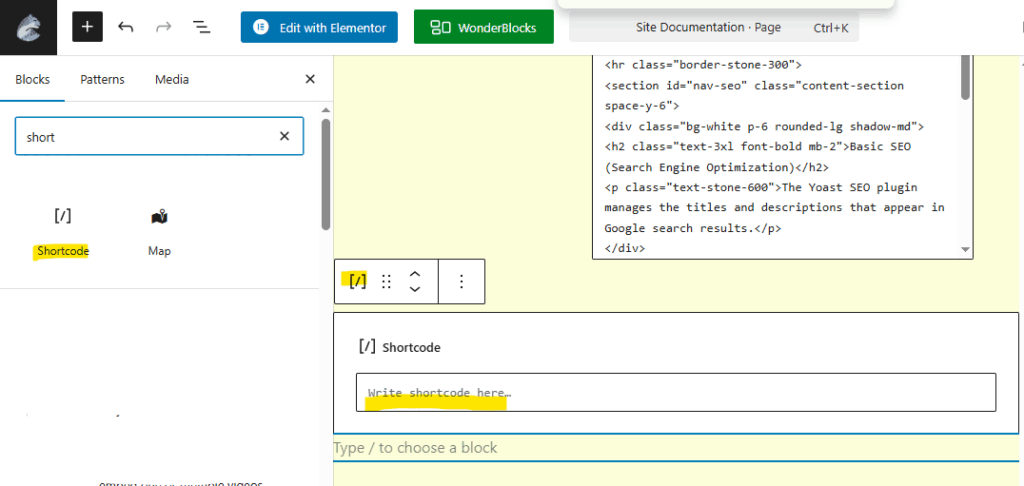
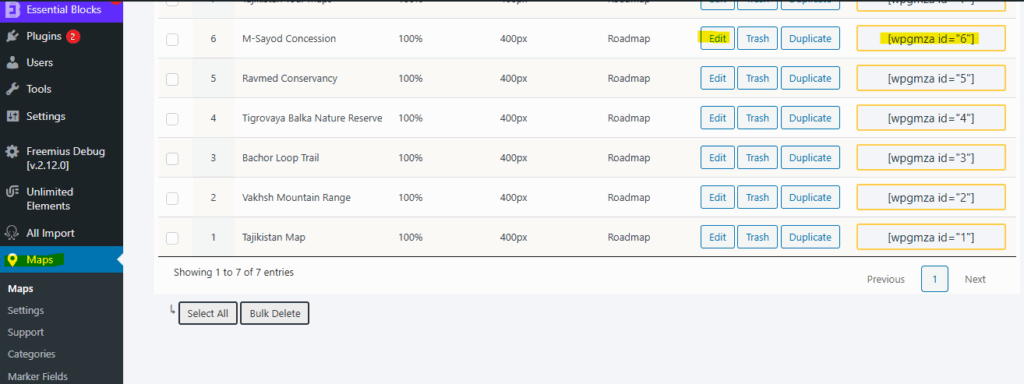
Maps (WP Go Maps)
Maps are managed using the WP Go Maps plugin and displayed on pages using its generated shortcode.
Edit an Existing Map
- Edit Map: In the WordPress dashboard menu, go to Maps → Edit to modify a map. Set the center point, markers, and style.
-
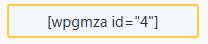
Copy Shortcode: Once saved, find its unique shortcode. Below is an example of the shortcode then copy the code:
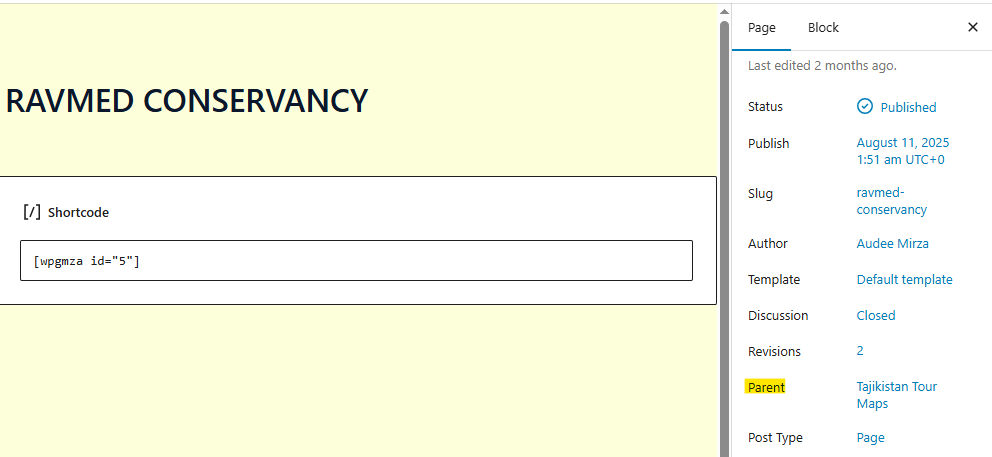
- Edit Page with Elementor or Page/ Post Editor: Open the page where the map should appear.
- Add Shortcode: Search for and drag the Elementor Shortcode widget onto the page. If the page is created using the Page/ Post editor, find the Shortcode Block and drag it onto the page.
- Paste Code: Paste the WP Go Maps shortcode into the provided text field.
- Preview: The map will usually not appear in the editor. View the live page to see it.
- Save: Click the UPDATE or save button.
Create a New Map
- Read the complete WP Go Map plugin documentation for creating a new map.
- WP Go Map allows you to add some of the map features. Click the links below to learn the complete steps in the WP Go Map documentation for each map feature.
-
Each of the created Map types will need JSON map data to visualize. If you have KML or KMZ map data, convert it first to JSON using web tools, such as MyGeodata. Copy the JSON map data to get the precise location of the map and paste it to the related map type field.